A while ago I was given some kind of packaging material that appears similar to blanket insulation. I wasn’t sure what to use it for until I decided to make a tea cosy to keep my tea pot hot.
It’s damp/humid where I live so I was worried that if I made a simple tea cosy it would get damp where the spout is and I would end up with mould on the cosy. So, I decided to make a tea cosy with a hole for the spout. I tried to take images throughout to show you how you can make your own!
You will need:
- light weight to medium weight fabric for the outside (shell) and inside (lining) (something that doesn’t stretch and can withstand higher temperatures; I think I used a kind of cotton, but I am not sure)
- insulating/padding material
- a small piece of bias binding
- thread
- pins or clips
- fabric scissors
- a sewing machine (a basic domestic machine will do)
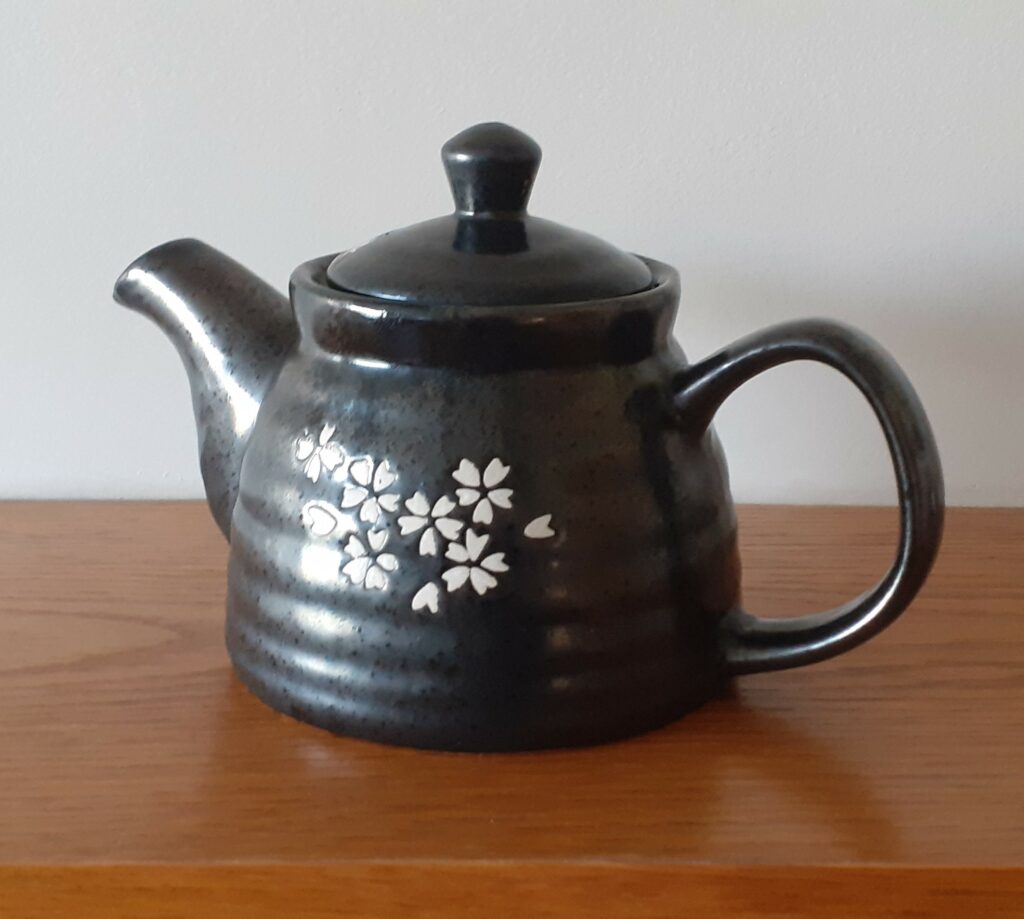
I most often use this small tea pot, so I designed the cosy for this size. However, I also have a larger tea pot and want the cosy to also fit that larger pot, so my aim was to make a tea cosy that would loosely fit around the smaller teapot thinking it will also fit the larger one.
I used wallpaper to make a pattern piece but it’s actually a bit too stiff to make a pattern for this kind of small, three-dimensional item. I made it work, though. I cut out a long piece with the shorter side taller than the pot is, and I then drew a vertical line (across the shorter distance) in the middle to create a left and right side. I wrapped this piece of paper around the tea pot aligning the line with the handle. I then made some markings where the spout sits and at what height the pot ends, and I trimmed off the excess paper:
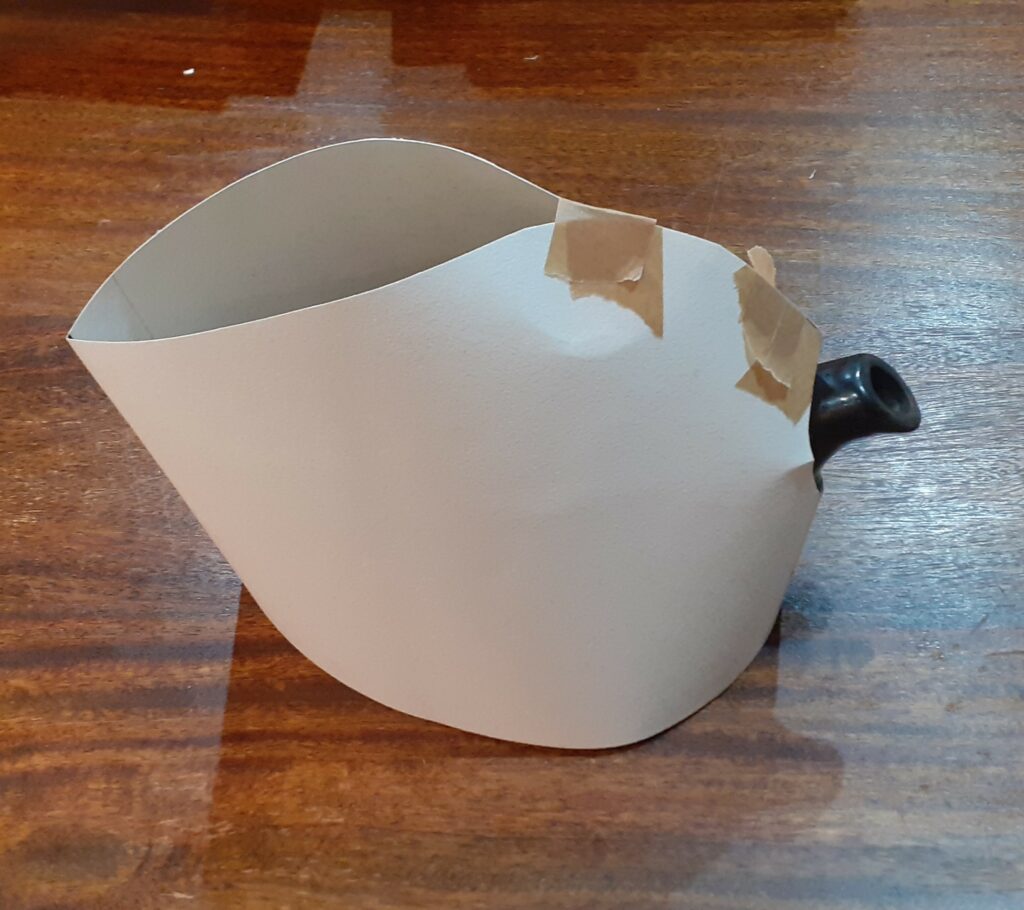
The paper is kind of stiff so I couldn’t really tape the whole top shut to see what the cosy would look like, so I just held it with one hand to get a quick impression:

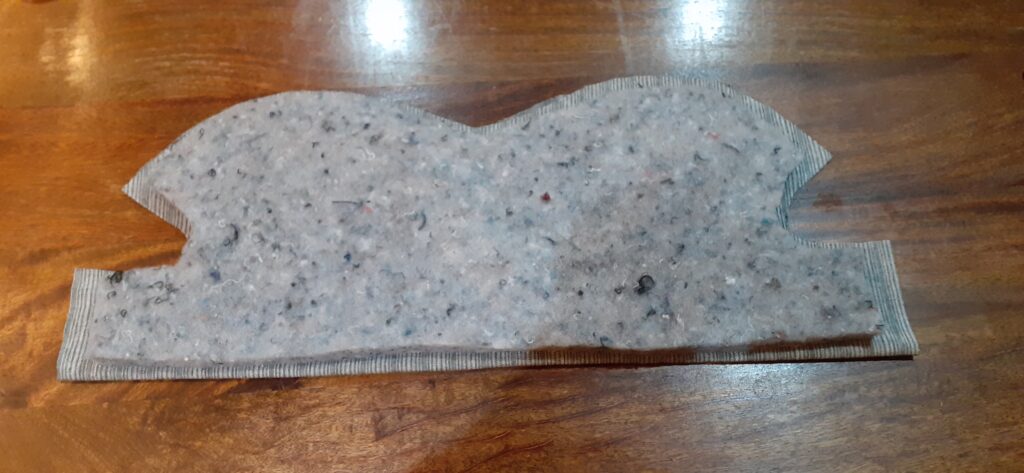
I trimmed off any excess (in hindsight I could have made the top above the handle a little lower as there’s now some excess space there) and cut out the insulation material using a wide seam allowance/excess (because I want the cosy to also fit my larger tea pot; yes I could have just designed the cosy for the larger tea pot as it will then also fit the smaller one, ha!):

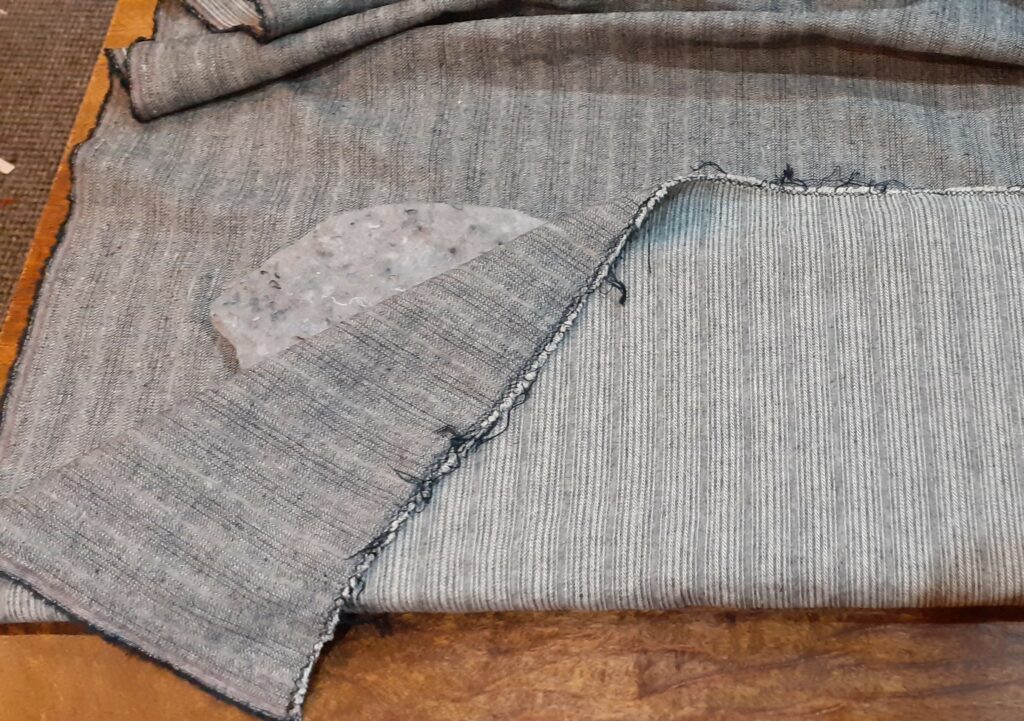
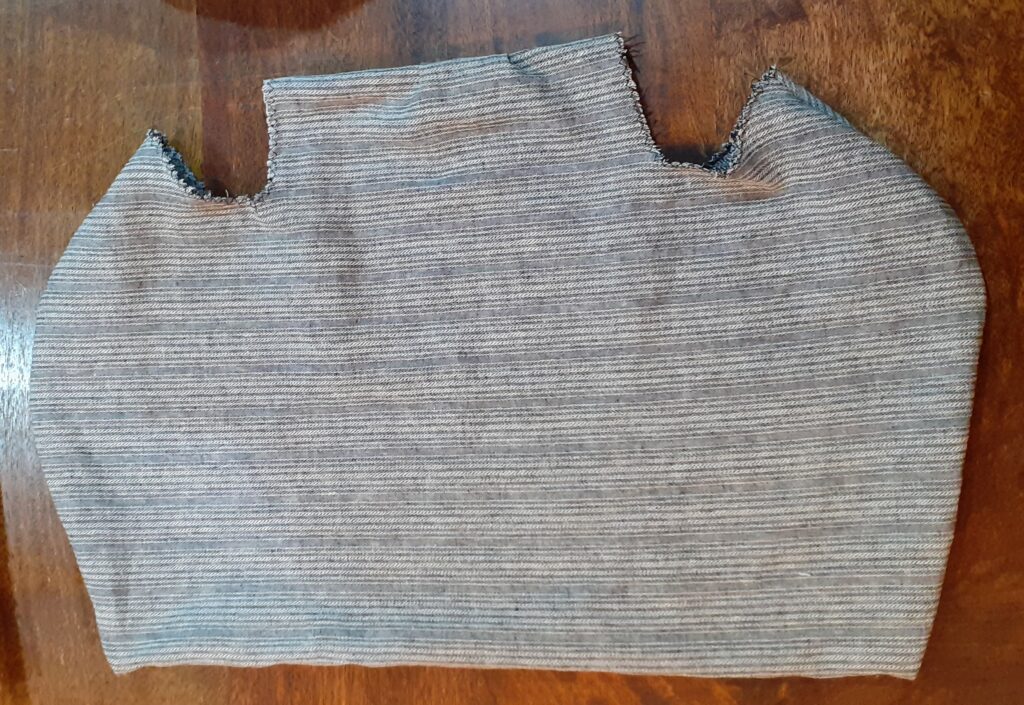
I want to use the same fabric for the outside as well as the inside (the lining) for convenience. I folded the fabric horizontally and slid the insulation material in and then cut around this with about 2 cm seam allowance (cutting the top piece and bottom piece of the fabric individually):
An easier way to do this would be to just fold the fabric, place the insulation material on it, and then cut around the shape:
I stitched the domes together (with the right sides facing each other): one will be the top of the outside (shell), the other will be the top on the inside (lining). I also stitched the part together where the spout sits, and zigzagged the seams and spout opening:

I then turned this inside out to get the right side on the outside:
I used a coarse hand stitch to stitch the insulation material together. Note that it doesn’t look great at the top, above the handle. In hindsight I would trim that excess ‘pointy’ bit off and let the cosy slope down a little more there. I did trim some of the insulation material off after I took this photo but not as much as I would if I were to do this again. I used a vacuum cleaner to clean this insulation material as I realised cutting the material resulted in small fibres coming off and I wanted to get rid of them.

Now it was time to put the insulation into the fabric shell. I inserted the insulation material through one of the spout openings and aligned the spout hole of the shell part of the fabric with the spout hole of the insulation material. I then pushed the ‘lining’ part of the fabric into the dome created by the insulation material (just like you can push half of a deflated ball into the other half) and fiddled around until the lining fabric was also aligned with the insulation material:

I used clips to clip the lining and outer shell fabric together ensuring I did not grab any of the insulation material. I then used my machine to stitch the fabric together:

Finally, I used black bias binding to finish the raw edge of the spout hole (I used my larger tea pot in the next photos):

I used a hand stitch to secure the fabric shell and lining to the insulation material so the cosy would not lose its shape (shown above). And here is the final item:

I realised after I had already cut the materials that the hole for the spout is wider than needed. I also realised that because the lining and outer shell are the same size and the insulation material is quite thick, I have excess fabric on the inside. But I think this is a lucky coincidence as it helps close off the spout hole a little.
It is possible to pour tea without removing the cosy but I worry that repeated grabbing and deforming the cosy will result in the insulation material deteriorating (falling apart or creating lumps or irregularities). But it takes one second to briefly remove the cosy to pour tea, so it’s no issue.
If I were to make another one, I would make the spout hole narrower and make the lining a tad smaller than the shell to prevent excess fabric. I would also adjust the pattern to slope down more at the top, above the handle, as opposed to having the ‘point’ there. I might also consider adjusting the pattern so that I can more easily pour tea without removing the cosy. But all in all I am quite happy with how it turned out and it keeps my tea warm for longer!