I normally buy underwear from the store, but sometimes the fit isn’t quite right, I think that’s because I have a relatively small waist but a much fuller bottom/hips meaning a lot of my volume in this area is positioned on the back. So, I wanted to try my hand at making my own underwear!
I usually wear thongs, so that’s what I wanted to make. I took various measurements to make sure I had a good idea of where my body parts are as this is important to design the garment to fit me right (I write my current weight on my patterns so I know what ‘size’ the pattern is, as I expect any future weight loss and weight gain to be in the same areas):
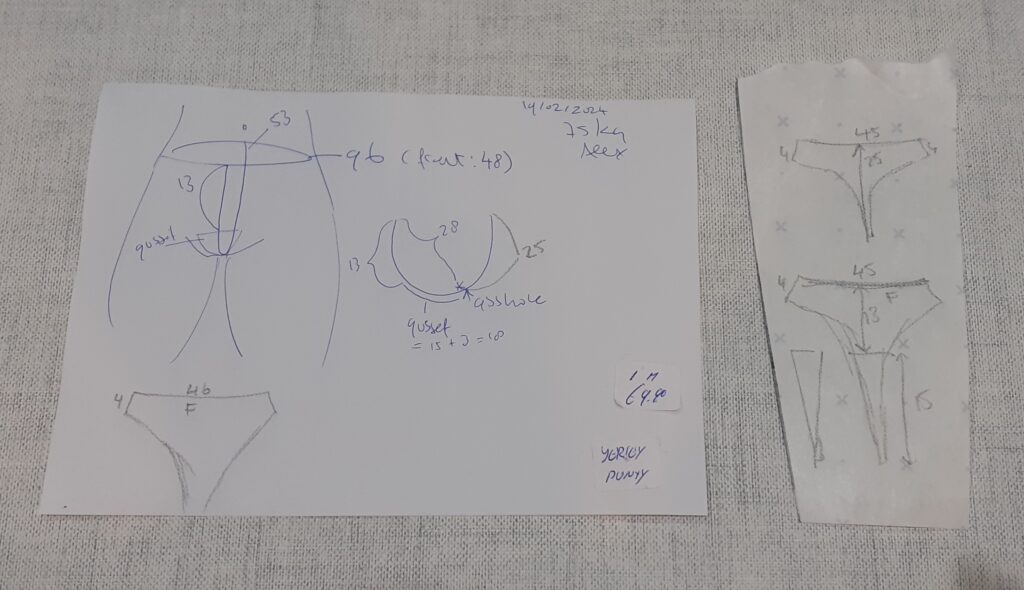
I wore underwear whilst taking these measurements as this helps to determine where you want the ‘waist’ to sit. So, I measured the following:
- Circumference where I want the ‘waist’ of the underwear to sit (96 cm for me)
- Distance from the ‘waist’ to where I want the gusset to start (13 cm for me)
- Distance from the ‘waist’ at the front to my bum hole (28 cm for me, this leaves me with 28 – 13 = 15 cm length for the gusset) (ignore the ’15 + 3 = 18′ scribble)
- Distance from the ‘waist’ at the back to my bum hole (25 cm for me; note that this is measured over a thong, if I had planned to make regular panties I’d have to wear those whilst measuring as the distance will be longer when not in your butt crack)
Store-bought underwear often has the gusset (the additional layer in the crotch area) positioned too far towards the back, so I made sure to measure how far it needs to reach in the front to cover the whole genital area. I also measured where my bum hole sits to know where the gusset might need to end. Sorry, I know it’s a bit TMI, but if you want the underwear to fit right, you need to be mindful of your measurements in this area.
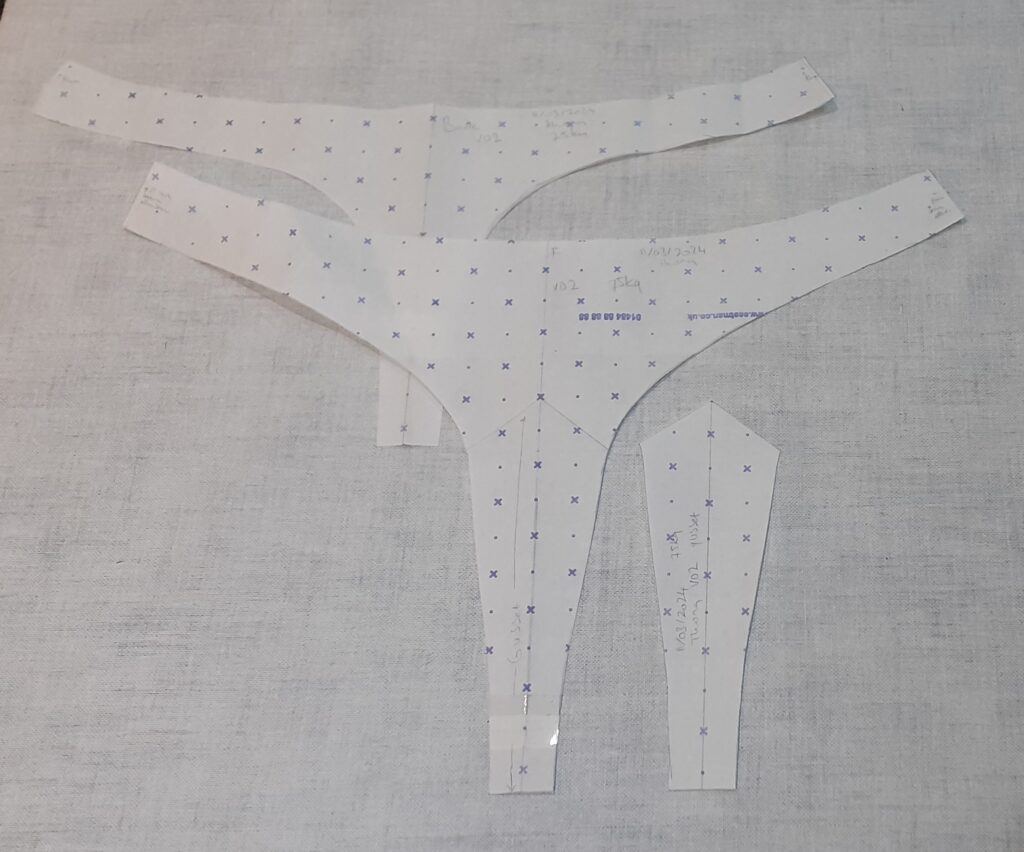
I decided on 4 cm of length for the sides, based on underwear I already have. I made the shape of the underwear along the lines of underwear I already have, so the width of the gusset is about the same as store-bought underwear (as this width works for me). I first drew a quick sketch on some scrap pattern paper (the right bit in the image above). I then drew this full-scale on pattern paper (this is v01 of my thong):
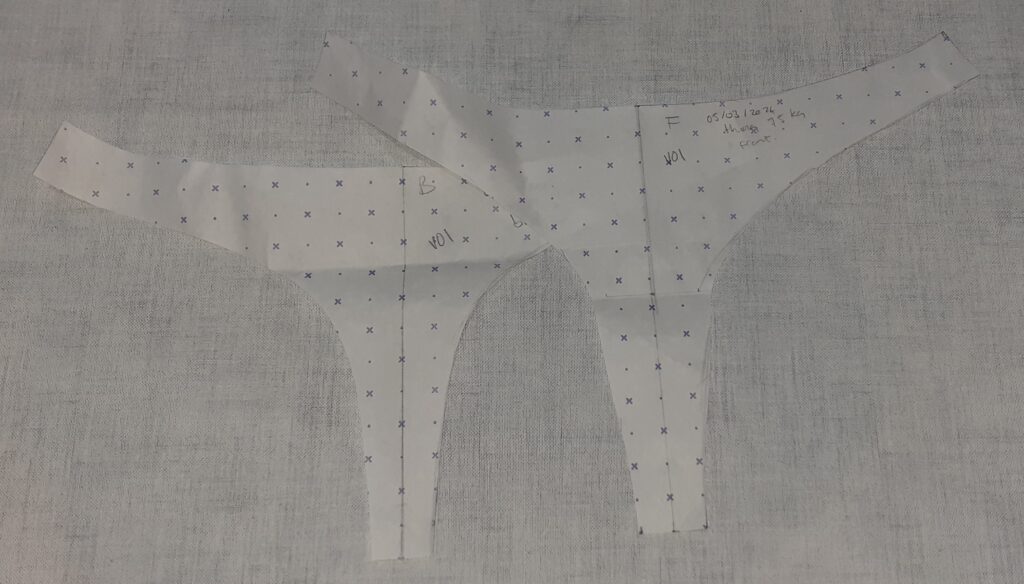
I didn’t cut out a separate pattern piece for the gusset, as I simply used the pattern piece for the front but only cut out the bit that would be needed for the gusset.
I used fabric that’s a little thicker than regular T-shirt fabric, and it has some stretch to it. I cut perpendicular to what you would normally do, because I wanted the lines to be vertical as opposed to horizontal (because the stretch seemed the same both ways, I felt it wouldn’t matter which way to position the pattern pieces on this fabric):
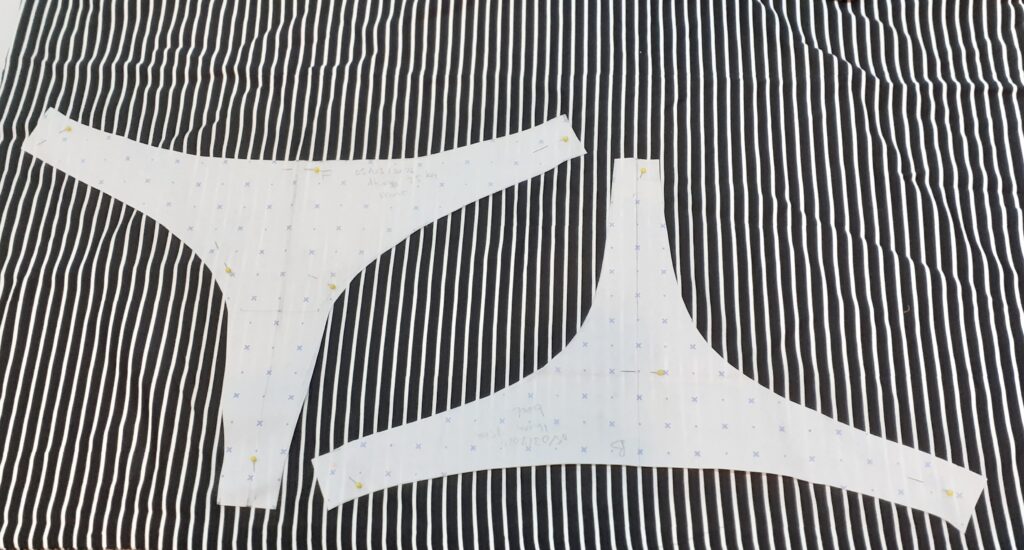
I used Gutermann sew-all thread, and underwear elastic (black with white edge). I made the gusset out of the same fabric as the thong. I used the same stretch stitch for all the things that needed sewing. I didn’t add any seam allowance except for at the side seams:
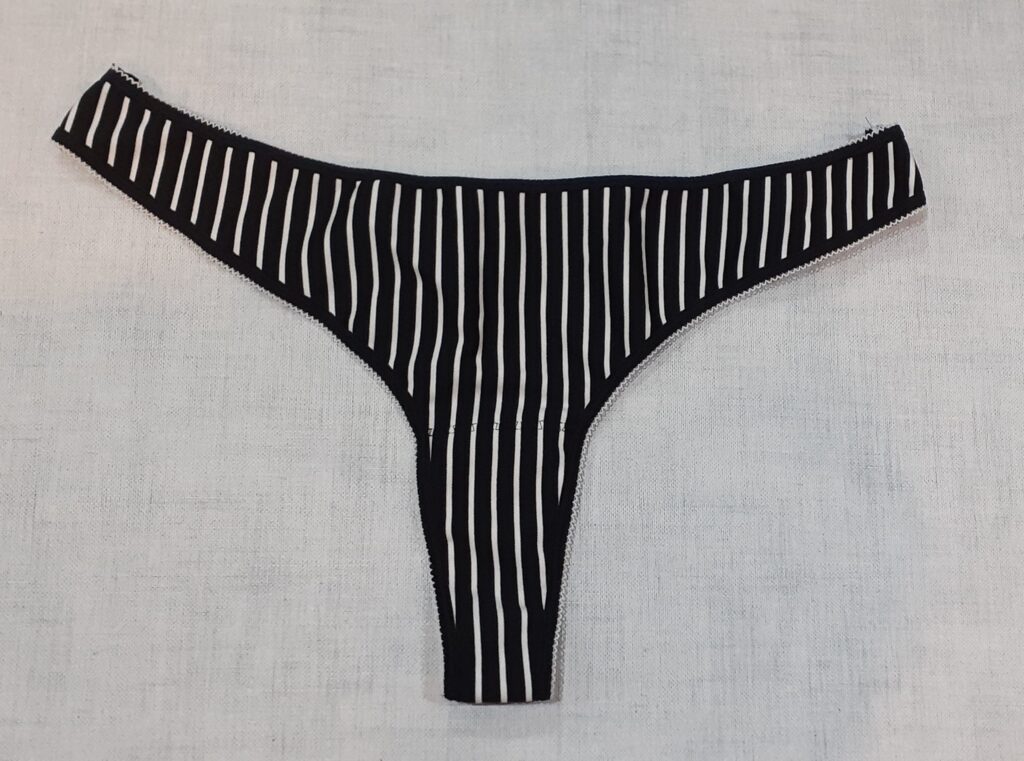
I put the thong in the washing machine and everything was still intact when it came out, hurray. The fit is pretty good and I really like the thickness of the fabric, but:
- the gusset could be a little narrower
- the gusset could extend a little bit more in the centre front to fully cover the entire genital area with some margin
- the gusset could be made of thinner fabric, as the striped fabric was already a bit thick for underwear, and it’s for sure thick for a gusset
- I could use a tiny bit more room in the ‘waist’ area
- at the back, on the top, the ‘holes’ could be slightly more cut out (to allow more space for the top of the bum cheeks)
- I should have made the gusset 18 cm long (as stated in the scribble I ignored!), 3 cm longer than in v01, so it would extend past the bum hole. This means 3 cm needs to be added to the front panel at the gusset region, and 3 cm needs to be taken away from the ‘tip’ of the pattern piece for the back
So, I made the changes described above to make v02 of this thong. Firstly, I traced the pattern made for v01, and made the alterations to the pieces (note that this time I did make a separate pattern piece for the gusset, due to its shape):
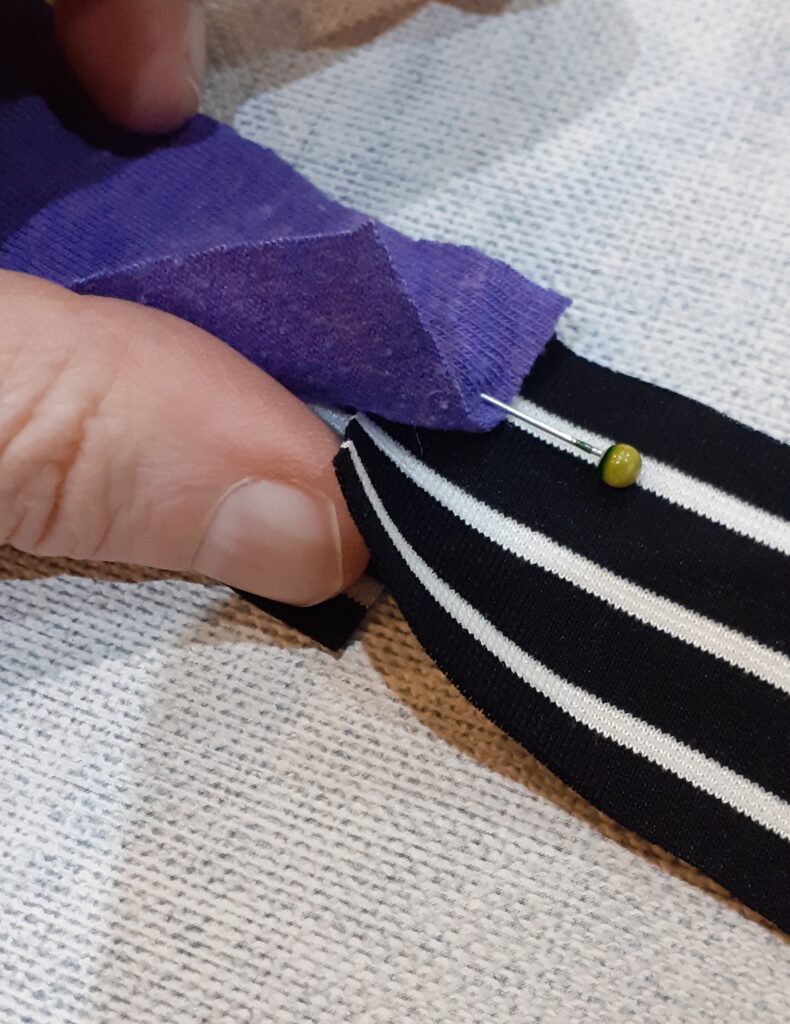
I then cut out the pieces. Because the fabric looks the same on both sides, I used pins to mark the front: even if both sides look the same now, they may actually be ever so slightly different so it’s always best to use the same side of the fabric for the outside, even if you don’t think there’s a difference:
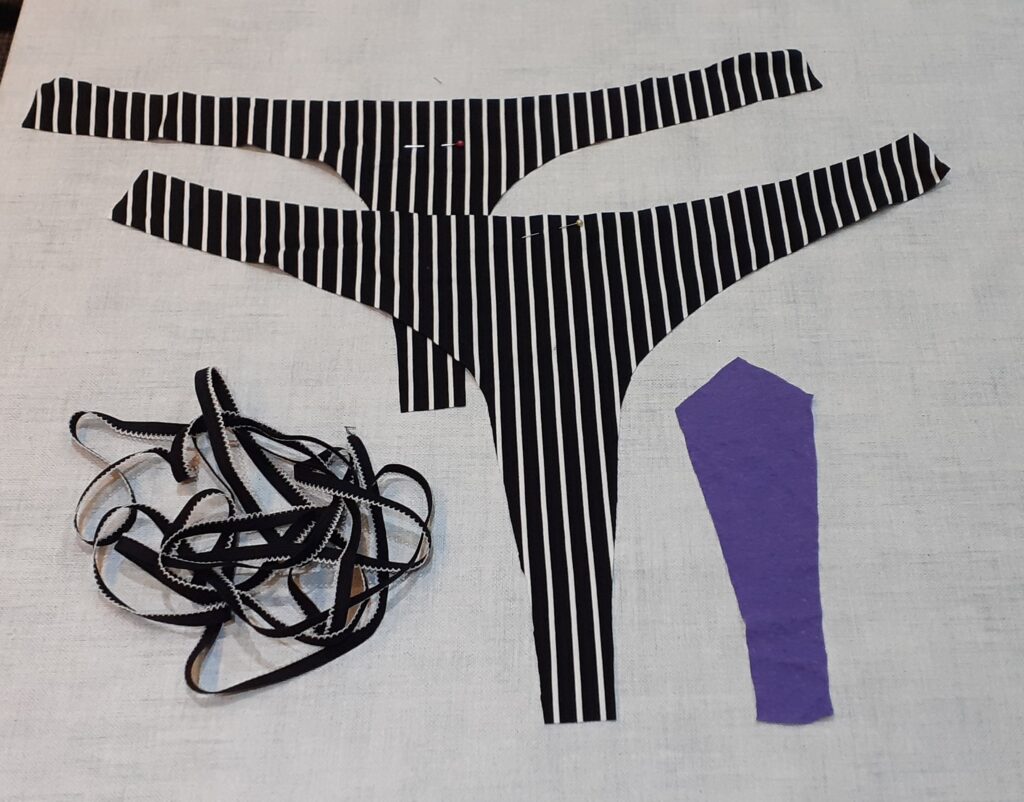
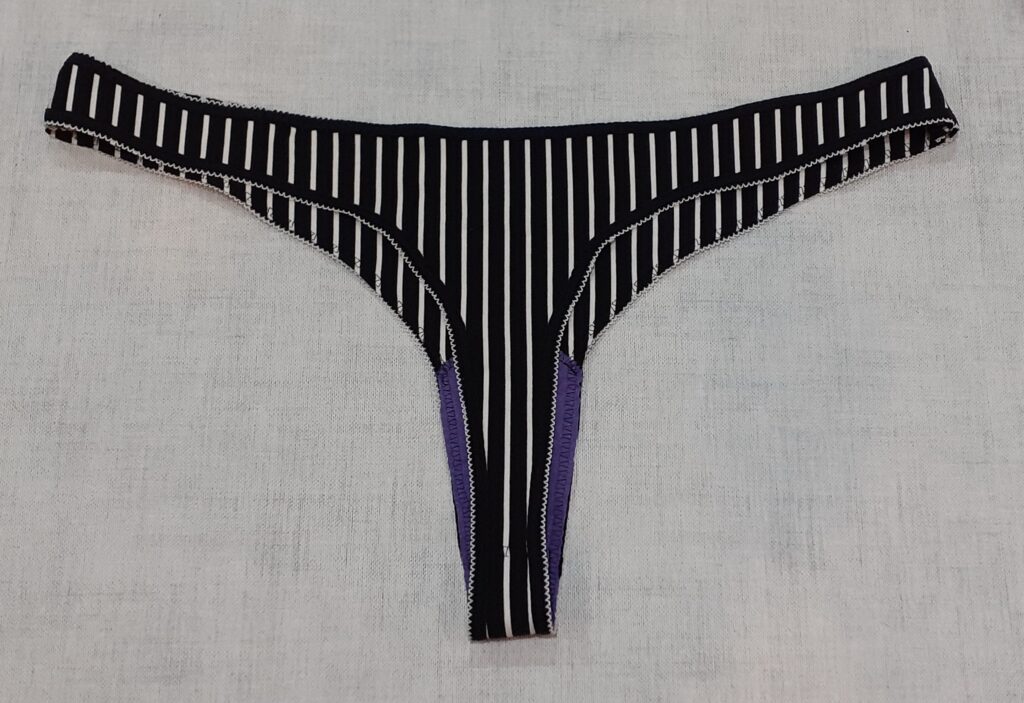
This time I used fabric from an old tank top for the gusset as it is thinner.
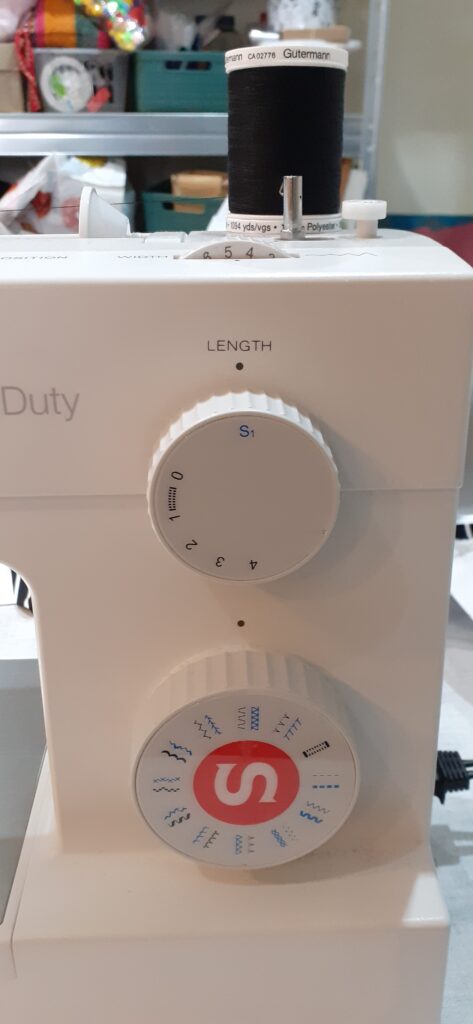
I used a stretch stitch on my sewing machine, changing the width when needed (always between 3-5 mm width):
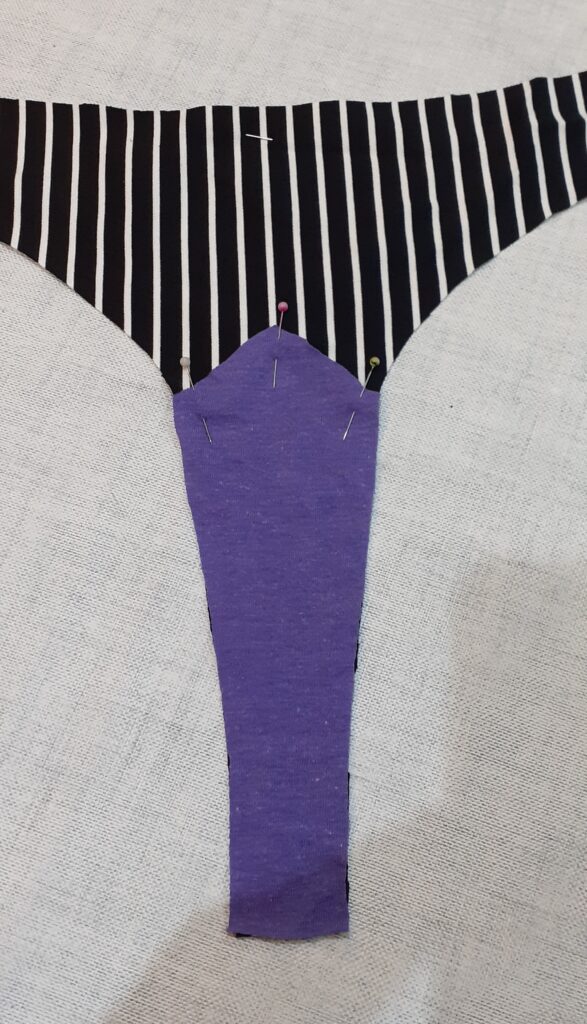
I pinned the gusset to the inside of the front piece and then stitched over it:
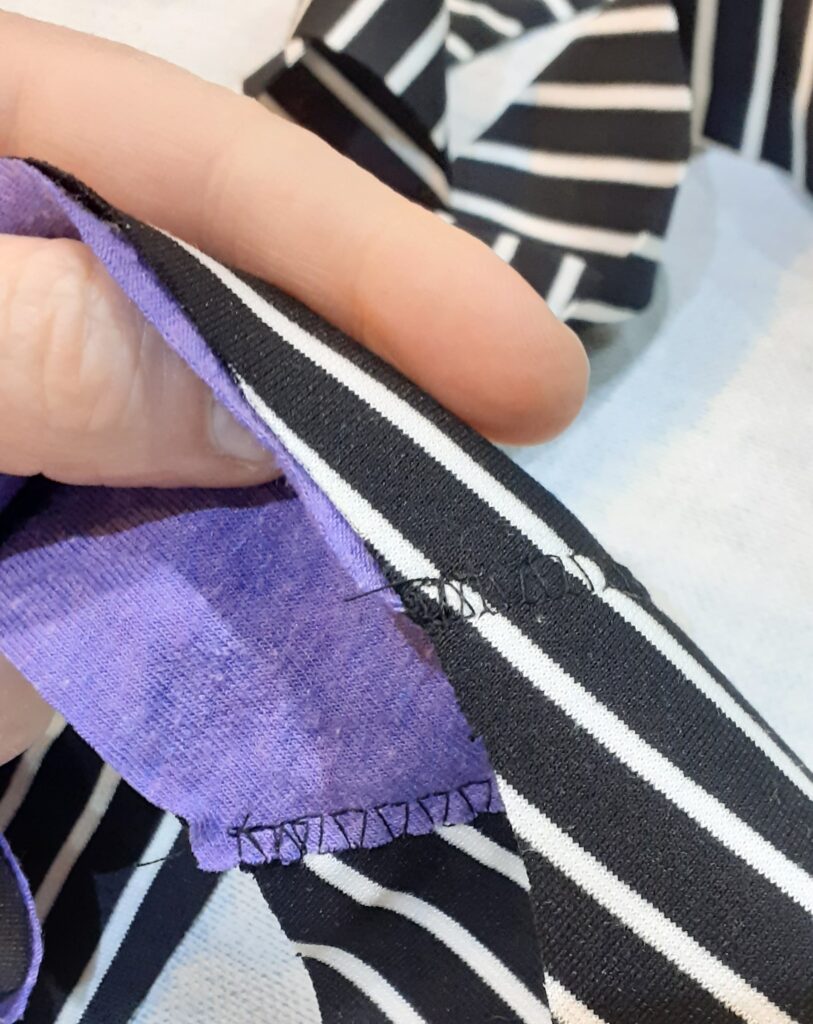
I sandwiched the ‘tip’ of the back piece in between the front piece and gusset (with about 8-9 mm overlap) and stitched over this joint to attach these pieces together:

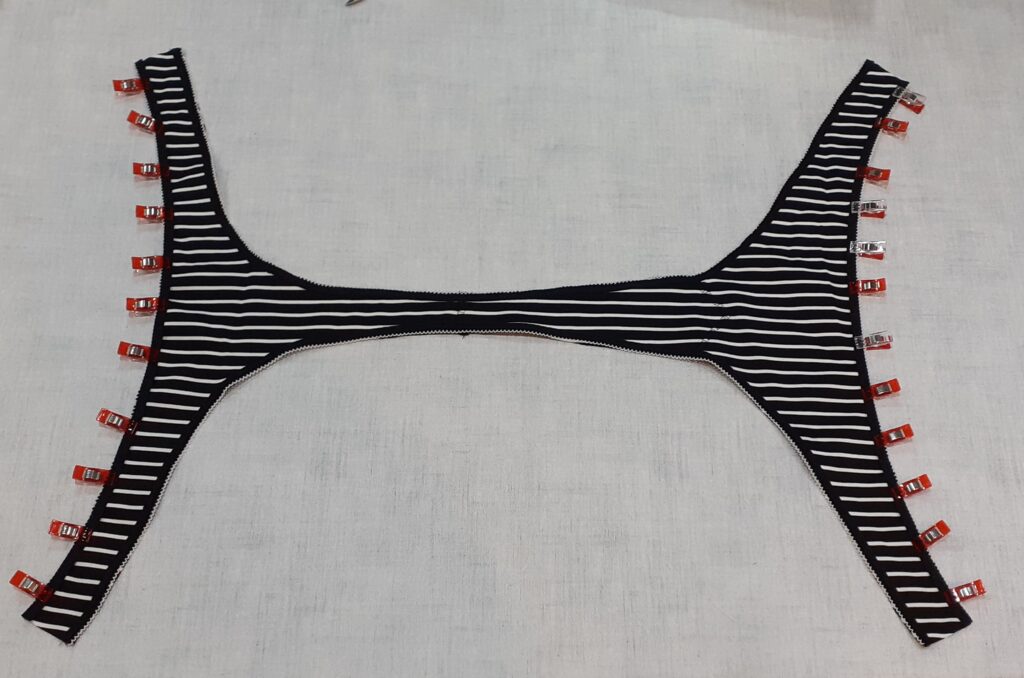
I measured the leg opening and cut two pieces of elastic of that length. I then clipped one of these elastic pieces to one leg opening and attached it with the stretch stitch, and I did the same for the other leg opening:

I used clips to position elastic to the ‘waist’ on the front piece and the back piece, and then stitched this in place:
I then stitched the sides together. Doing it in this way allows me to also take the waist in a little when I do finally drop those pesky 5 kg ;). The front:

And the back:
In v01 I did pull on the elastic a tiny bit when stitching it to the fabric, but I decided not to do that for v02 (edit: big mistake, I think this is the one thing I should have kept as I did for v01). I just washed v02 and it’s now drying, so I can’t try it on yet.
One thing I could change is how the gusset, front, and back piece come together: I could make it so the back ‘tip’ extends a bit further to the front (with the front piece gusset area shortened a little) so that this joint is away from where the gusset itself joins the back ‘tip’, as this avoids having 3 layers of fabric stitched on top of each other. I might do this for v03, but I feel I am pretty close to the perfect thong for me.
Luckily I still have enough of this fabric left to make a handful or so more of these things, so I can experiment a little more. I never thought I’d be making underwear as I’ve been avoiding stretch fabric for most of my life as I just didn’t have a machine with suitable stitches. But my Singer Heavy Duty does have some stretch stitches, which is one of the reasons I decided on this model when I bought it a couple of years ago. It’s not going to be the same as a multi-thread overlocker, but I think the stitch I used works quite well for this thong project!
Update: v2 sits quite well BUT it’s actually too loose :/. I think I should have tightened the elastic a little as I stitched it to the fabric. I will do this for a next iteration.