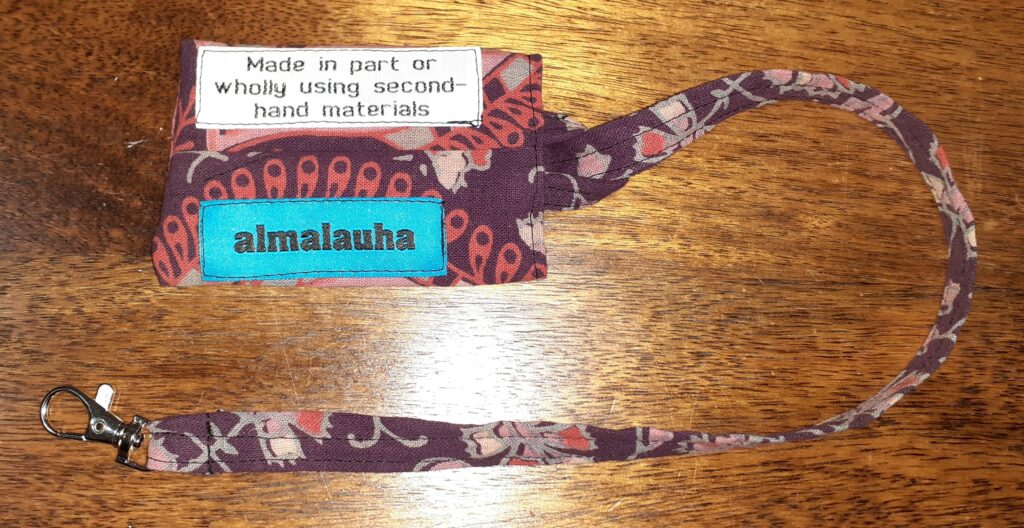
In this tutorial I will show you how to make a wallet for one or a few bank/travel cards. The wallet has a strap with clip so you can clip it to your handbag to safely carry the wallet inside your bag.
You will need:
* fabric (not too thick)
* a small clip (lobster clasp or similar)
* sewing machine thread
* fabric scissors
* pins
* bodkin
* an iron
* a sewing machine (a lightweight domestic sewing machine will do)
Firstly, I thought about how to make this as there are multiple options. I wanted the wallet to be lined, so I would have to make an outer shell and inner lining. I want to be able to easily take my card out but also that the card is fairly secure inside it (not falling out). As I intend to carry my travel card in this wallet, I didn’t want to add any metal snaps to it in case it would affect use of the chip. I created a simple sketch to help me figure out what pattern pieces I need to cut:
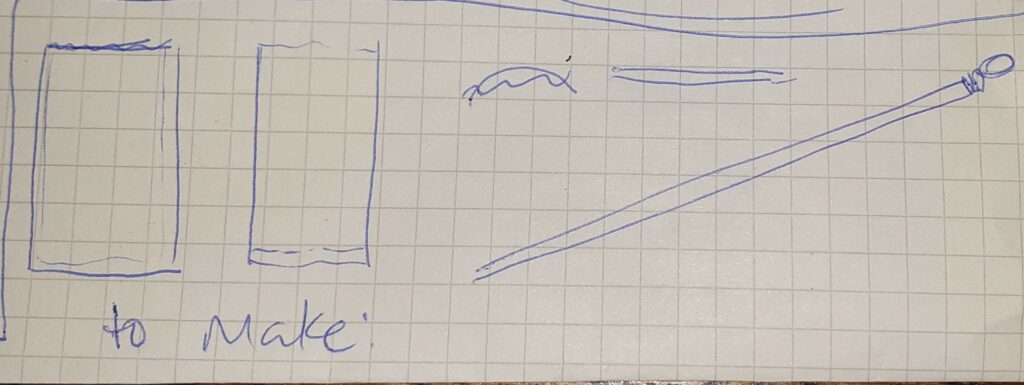
I decided to make separate outside and inside pieces, a small fabric loop, and a larger fabric strap with clip. The strap with clip will be inserted through the loop to close the wallet.
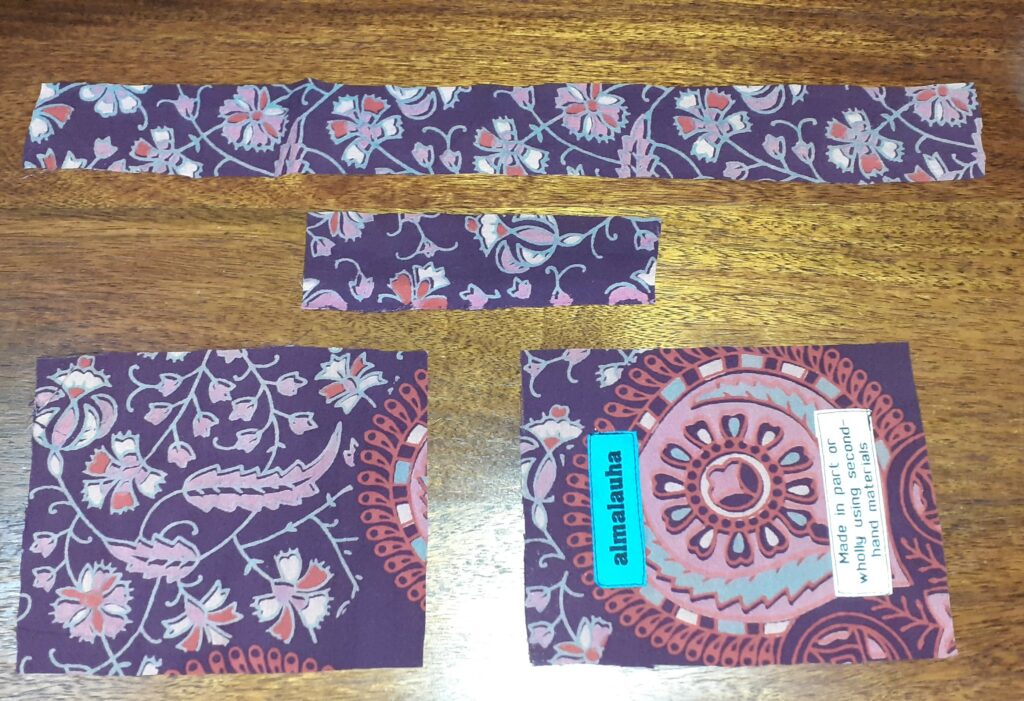
You will need to cut the four pieces: two of the same size (the outer shell, and inner lining), a small strip that will become the loop, and a larger strip that will become the strap. The size isn’t an exact science but you will need to ensure that the shell and lining pieces are large enough for your bank or travel card to fit and allow for about 0.5cm extra width and 0.5-1 cm length, in addition to the seam allowances (I used 1 cm seam allowance for most sides, and allow a little more seam allowance on the side of the shell and of the lining pieces that will be folded inside at the opening of the wallet):
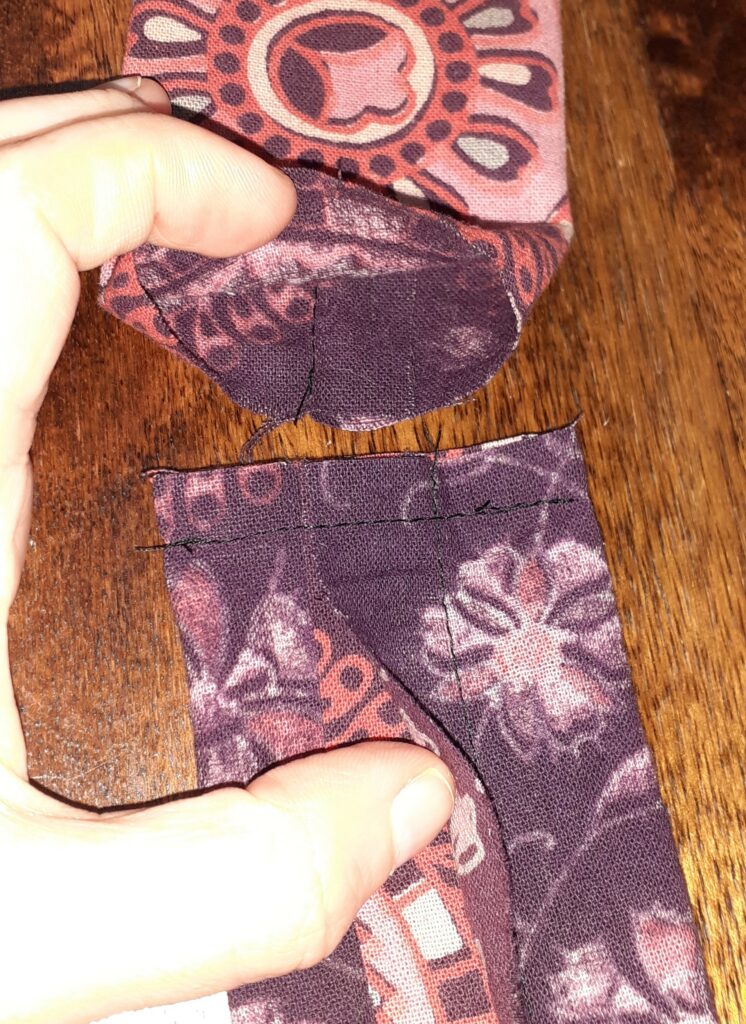
I stitched the long sides together of both the shell (with the labels) and lining and whilst still inside out, closed one of the openings to form the bottom. Note that I ensured the seam allowance of the long sides is placed in the centre before stitching the bottom seam, and I made it so the excess fabric would point one way for the shell and another for the lining (when placed inside each other; yes, for one of the pieces the seam is a little off centre, that’s fine):
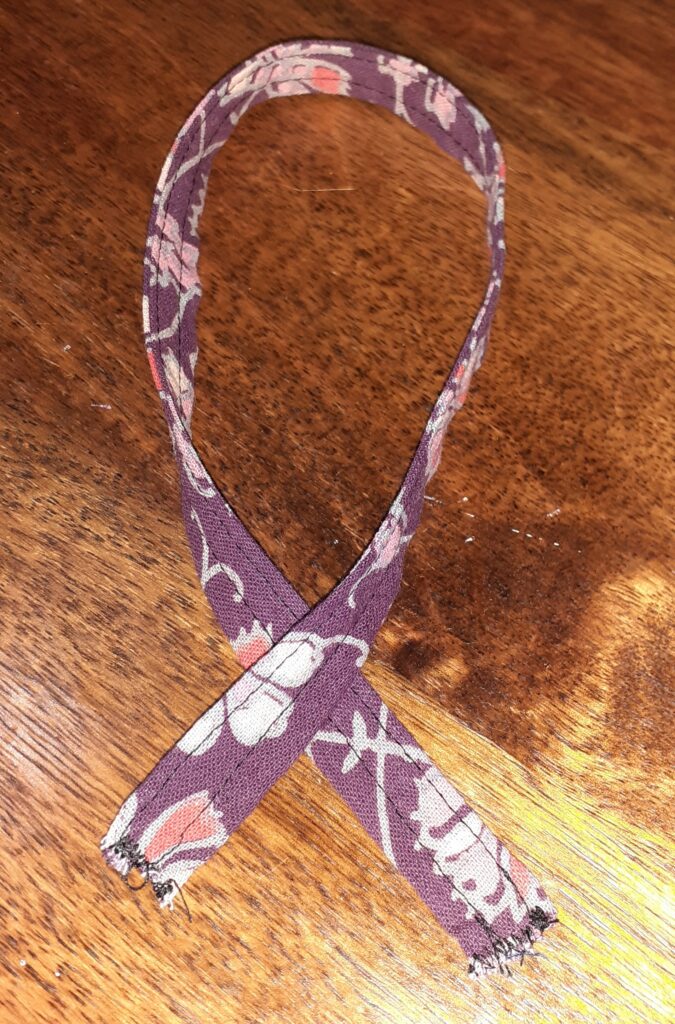
I then folded/rolled the long edges of the smaller fabric strip inside so that I created a kind of cord and stitched twice to fix this in place. I folded the longer strip along the length with the right side facing inward and stitched once:

The strap needs to be turned inside out and that was quite challenging. I have a loop turner but couldn’t get it to work, I think because the channel is so narrow. I ended up using a bodkin with the tool placed inside the tunnel with the mouth pointing to the opening, and fiddling to get some of the fabric at the opening into the mouth of the bodkin. It worked, and I was able to turn this strap the right way out! I used an iron to flatten it and then stitched over it twice:
Then came the time to assemble the pieces. I used an iron to press the seam allowance a the top of the shell inwards and that of the lining outwards so that this excess fabric would be hidden inside the wallet. I used pins to hold the strap and the loop into place before I stitched alongside the opening:
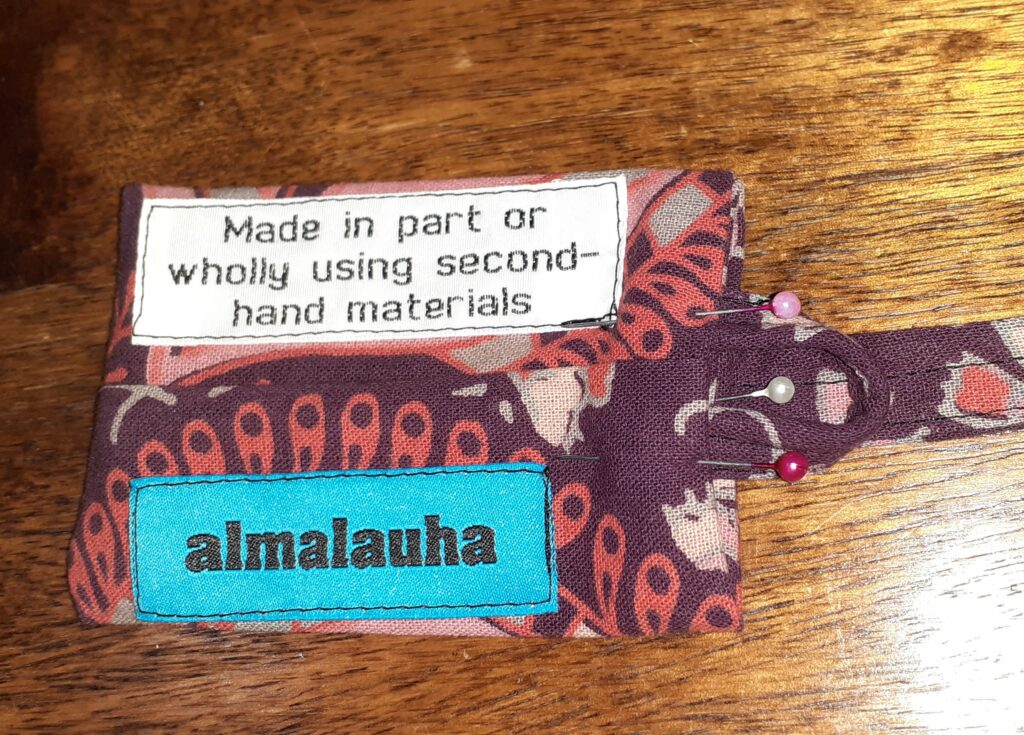

Finally, I attached the clip to the end of the strap. Pulling the clip and strap through the loop allows you to close the wallet. Simply loosen the strap a little to be able to remove the card from the wallet.
This is a quick project that is not too difficult but it was a little fiddly. I usually finish all my seams with either a zigzag stitch or my overlocker but as all the seams are hidden inside and won’t experience friction and this is such a small item, I thought simply having enough seam allowance would be fine.