This week, I made lounge trousers for a man.
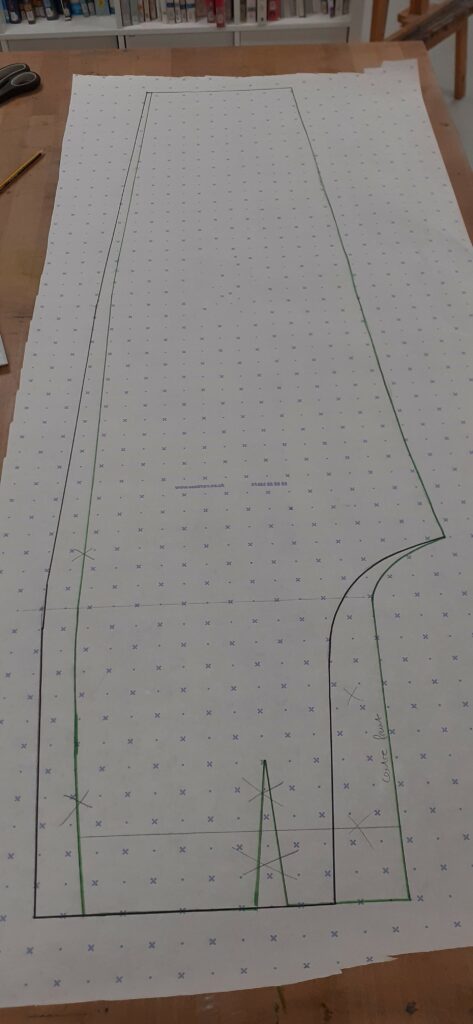
I started off making a block for basic trousers using his measurements. I used green pen to mark the front piece and red for the back:
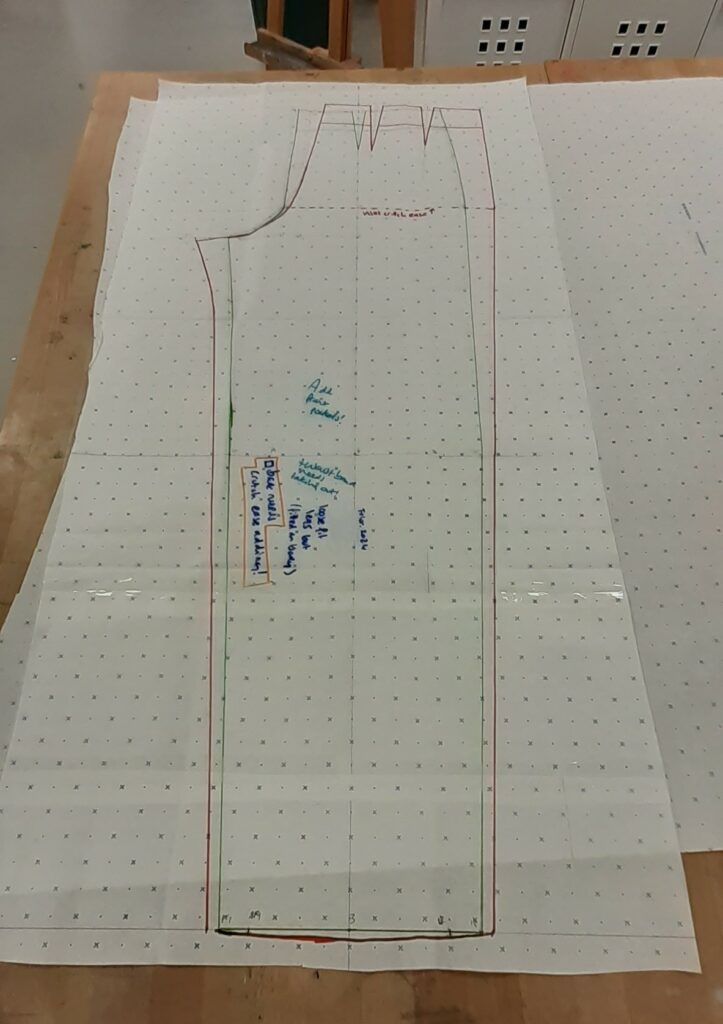
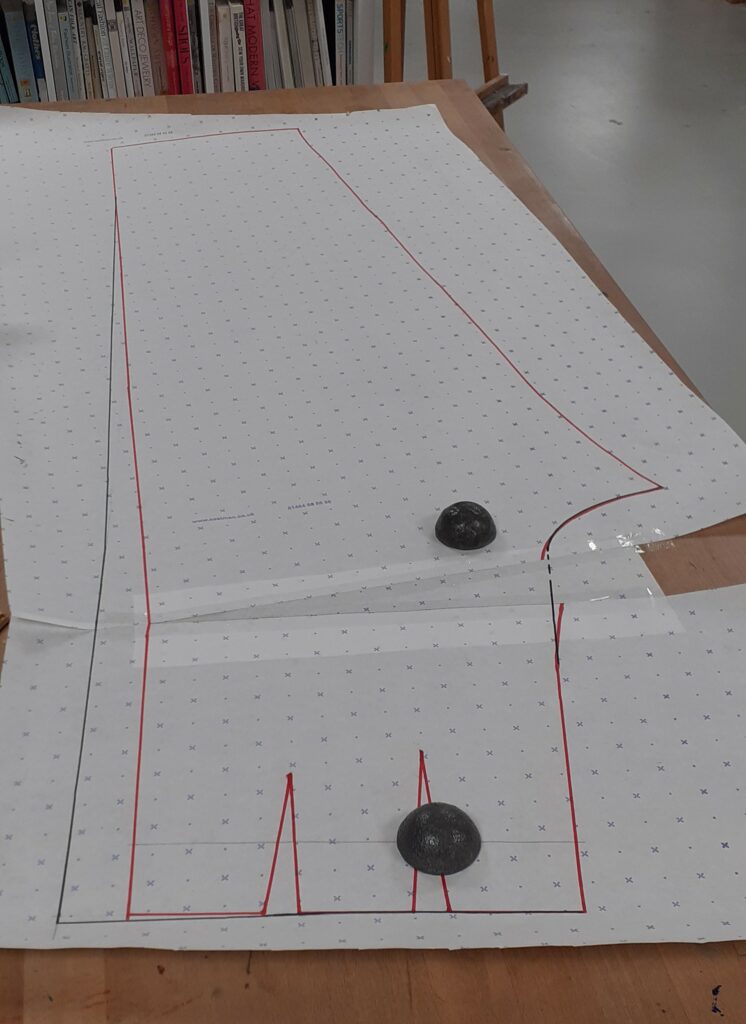
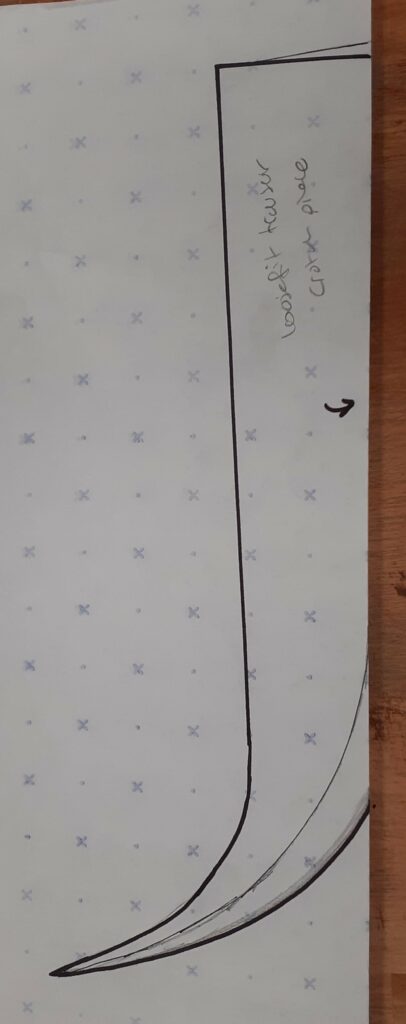
I then traced the front piece as well as the back piece onto a new piece of paper each. I made the required alterations to these copies (black pen), such as adding crutch ease to the back piece, adding a pocket (a simple pocket you just stitch onto the front), and creating a crotch piece similar to what you might see on thermal/long underwear. I decided to simply not make the darts as I want the trousers to be loose fitting, and for this reason I also added some width along the entire length, on the outside seam:
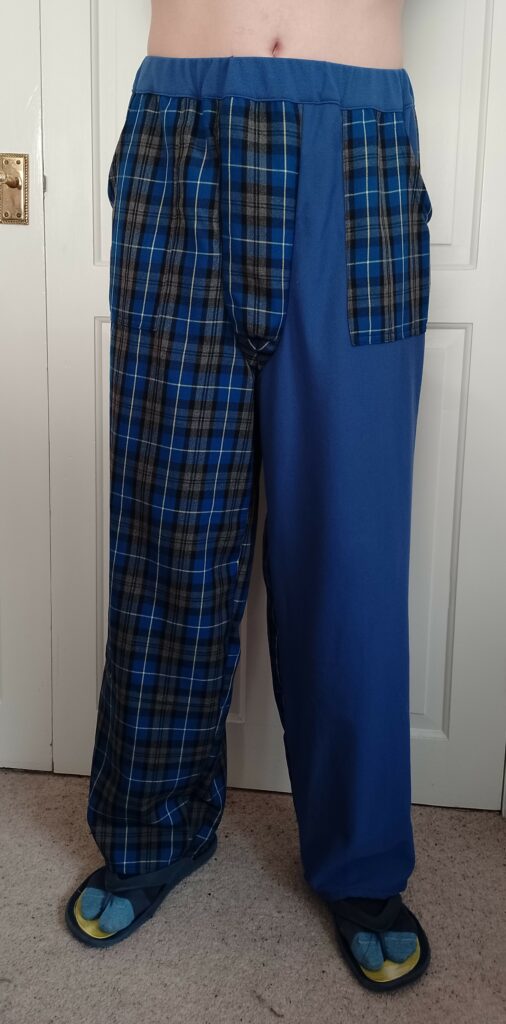
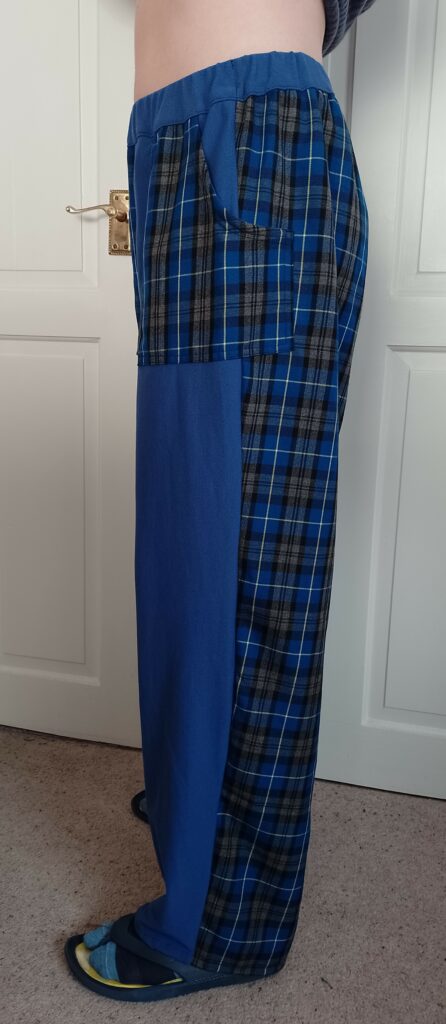
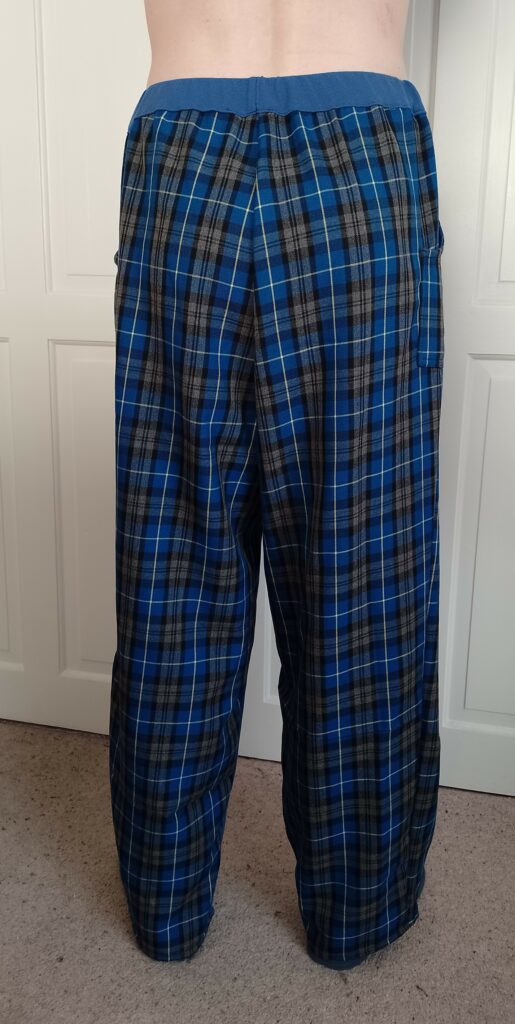
I used fabric available in the large stash at my course. However, for trousers you need a fair bit of fabric, and I couldn’t find enough of one fabric (black/blue plaid) for the whole garment. This means I had to find a second piece of fabric (blue polo fabric), which is why the trousers give off a bit of a ‘rodeo clown’ feel, haha!
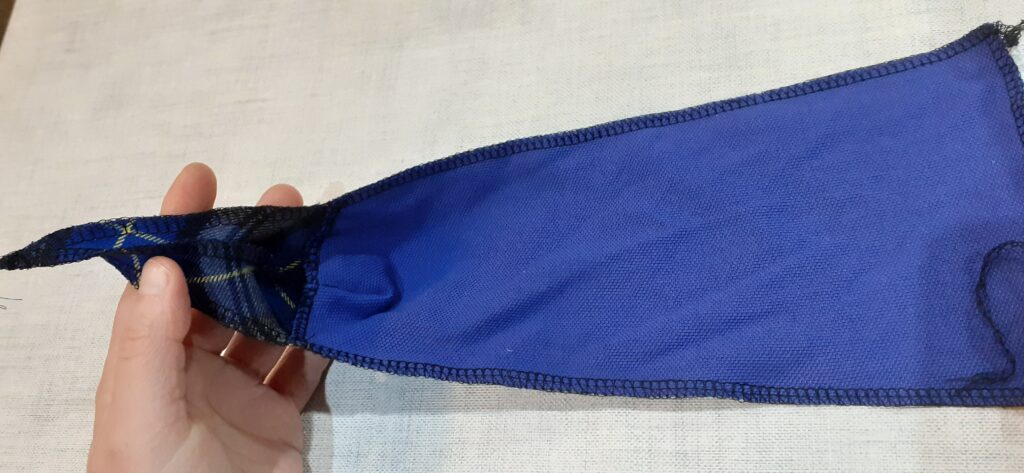
I lined the crotch piece so it is more comfortable to wear the garment without underwear:
I added simple pockets to the front (that extend a little towards the back piece, past the side seam). I wanted to add facing to the pocket because it is hard/impossible to finish a curved edge like this without additional material (bias binding or facing). I didn’t create a pattern piece for this as I am impatient and this garment isn’t a super exact project, so I just pinned the polo fabric I would use for this facing to the outside of the pocket (with the good sides of the fabrics facing each other):
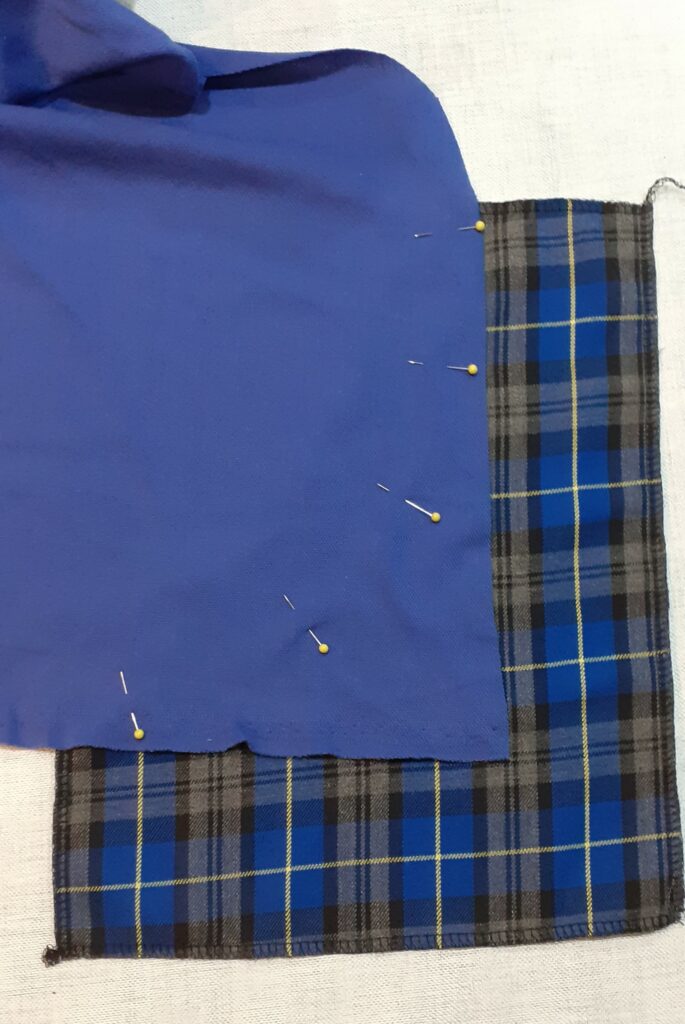
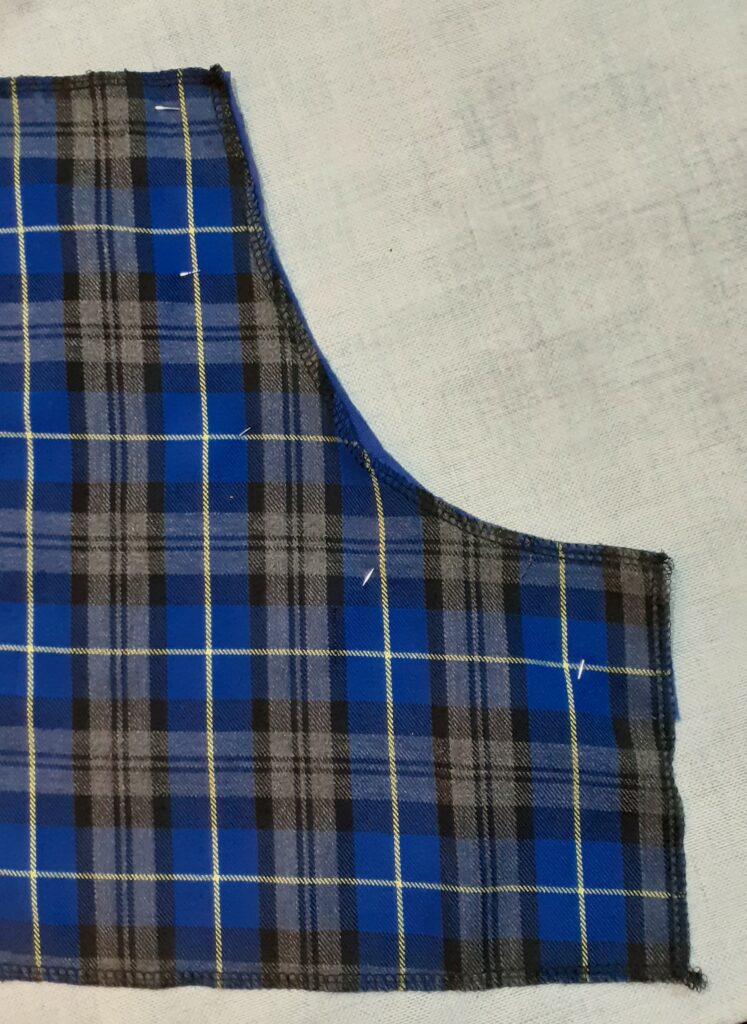
Cut along the pocket opening and top/side (seen from the wrong side of the pocket, the side that will end up on the inside of the pocket):
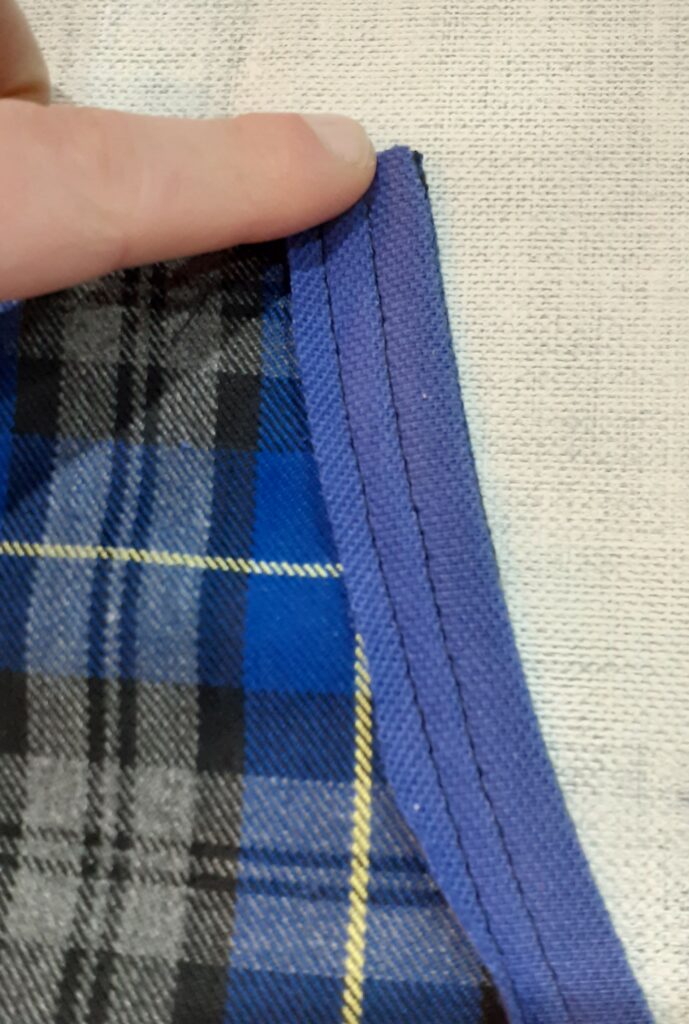
Stitch along the curved edge (+- 5 mm or so from the edge) and trim excess facing fabric (the polo fabric):
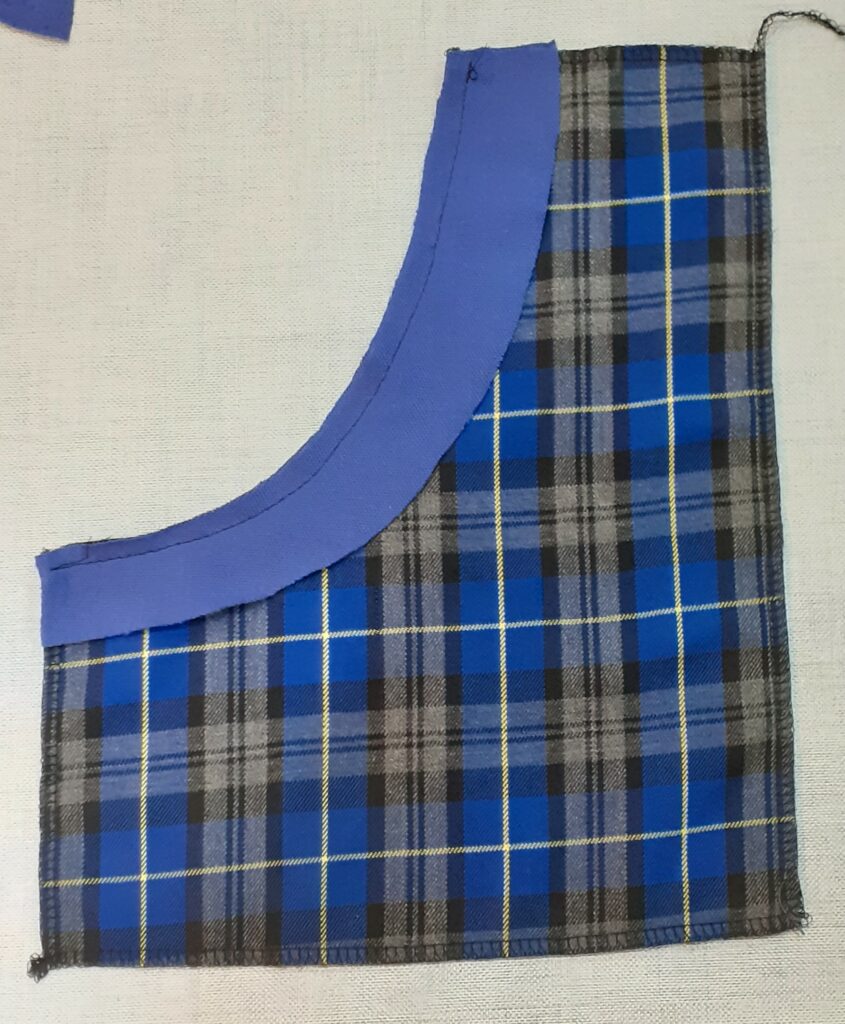
Because I already finished the edge of the plaid fabric and the polo fabric won’t fray, I didn’t have to finish this edge and could now move on to folding over the facing towards the inside of the pocket and ironing this to ‘fix’ into place:
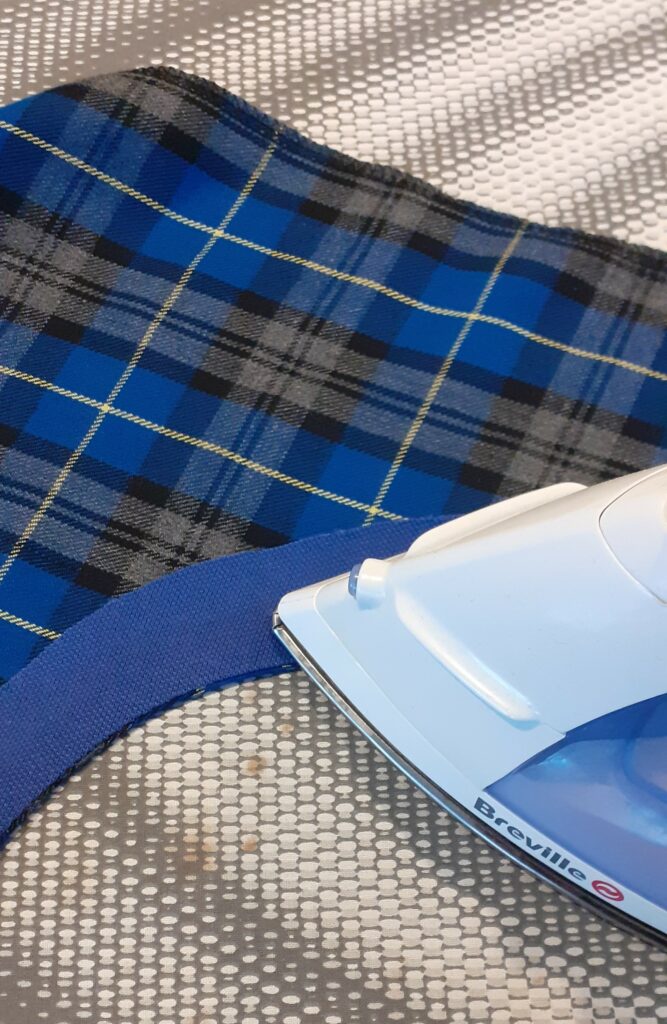
Stitch the facing into place using one or more rows of stitching (I did this from the outside of the pocket (the plaid side):
I attached a polo fabric waistband and inserted elastic. This makes the trousers easy to put on and off and comfortable to wear.
Here is the result. Note that the crotch piece seems a little off with regards to the plaid. In part this is due to the trousers not being worn exactly even in this photo, but the plaid is cut a little off-balance as well. This is the reason I never worked with plaid before, ha! I did pattern match the pockets (as is clear from hardly being able to see the pocket on the right leg).