A young family member wants to be a “rainbow mermaid” for Halloween, so I offered to make her costume. I have never done children’s clothes before, so I was looking forward to give this a go. Another challenge was that she’s in another country and that I have only once before (20 years ago) worked with Lycra/stretch fabric.
I started off by making a drawing of what the outfit could look like. I initially wanted to make leggings with a zipper on the front and back to ‘bind’ the legs together into a tail, but because of lack of time and her living in another country (so it was not possible to do any fittings), I decided to go for the easier option of making a skirt.
The child’s parent measured her and as they wanted the costume to be a little larger, I multiplied the measurements by 1.08 (so 8% larger) hoping this would be enough for at least one year of use.
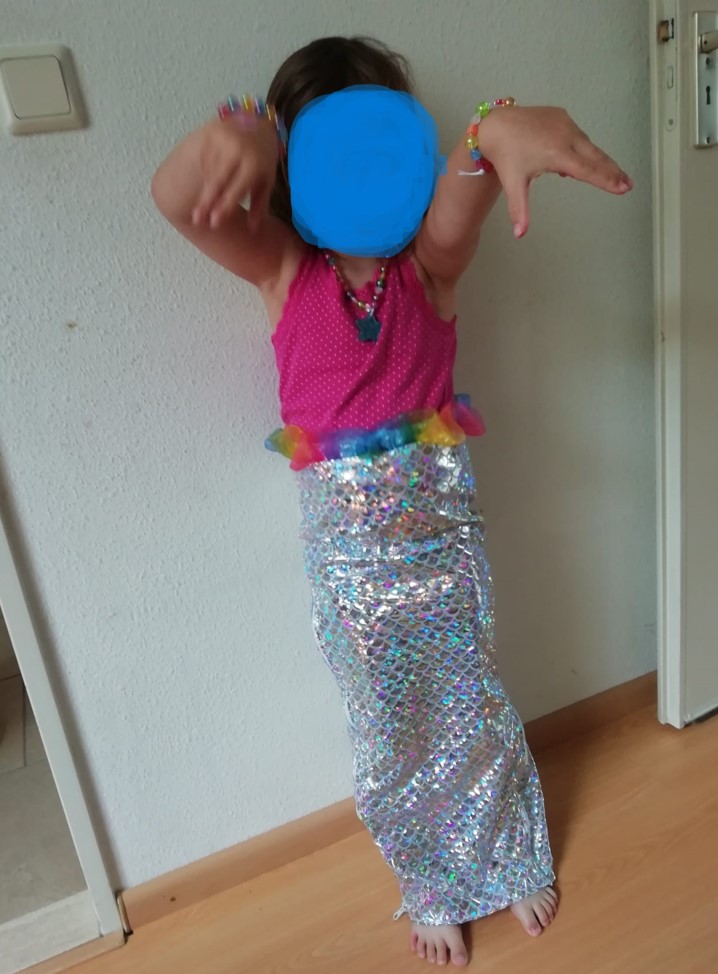
I started with the tail as that’s the most important part, as I was pressed for time. It was easy to draft a simple pattern for this: the front and back panel are almost a long rectangle in form (due to lack of curves in such a young child). The inserts are triangles with ’rounded’ edges. I ordered longer zips for when I still had the ambition to make the leggings, so I had to shorten them. It’s not ideal as the inside is a little bulky there, at the top of the zips, but it functions fine. I used a fairly thin stretch fabric with printed on ‘holographic’ scales. Due to that print, the fabric no longer stretches much (and I also feel it was almost blinding to work on with the sewing machine light being reflected in all directions, lol). The print wasn’t super sticky so I didn’t need a special foot for sewing.
The ‘puffy’ stuff at the top of the skirt is some kind of mesh (organza?). I was able to just rip it to get a long strip of it. I stitched the long edges together to make it easier to attach this decorative strip to the waist of the skirt. I used the ‘scale’ fabric to make the waist band. I used buttonhole elastic for inside the waistband so that the waist can be made smaller as needed.
I used a 4-way stretch Lycra in a nude colour for the top. I didn’t use a ‘formal’ way of making the pattern due to lack of time, so I just drew a pattern using the measurements based on the sort of standard shape for a long sleeve. If I were to do it again I would ensure the sleeves are attached a little differently, with the angle between the arm and the side a little larger. But I am told the top does fit.
The jewellery is made of a thin white rubber band (covered with some kind of fabric/thread) and plastic beads. The elastic is quite ‘slacky’ so shouldn’t be a safety issue and obviously the child isn’t allowed to sleep with the necklace on.
Last minute I made two fins (not pictured) that I sent just loose. The parent also sews and might find a way to include the fins in the outfit, either attached to the top of the shoes, or, as they just mentioned to me, to be the ‘cups’ of a bikini top as the child does like the fins. So, maybe that bikini top can be worn over the nude long sleeve top.
This project was super fun to do. I 100% would do this again, especially if I had the child with me for fittings etc (as I could then make something more complex/fitted). Because the child is so young, her whole torso is basically a cylinder so that made pattern drawing very easy.
I hope to be able to make something again next year, maybe for the girl’s sibling, who this year didn’t want me to make anything.
On to the photos. Apologies for the potato quality, I took this in my work room that has overhead spot lights, so I tend to get shadows no matter where I stand. The second photo is of the skirt with the zippers opened. The skirt is symmetrical but is laid down a little wonky in the photo.